How to Print and Cut Printable Stickers at Home
Learn how to print printable stickers at home, choose sticker paper, prepare transparent PNG files, get clean colors and cut scrapbook stickers by hand or with a cutting machine.
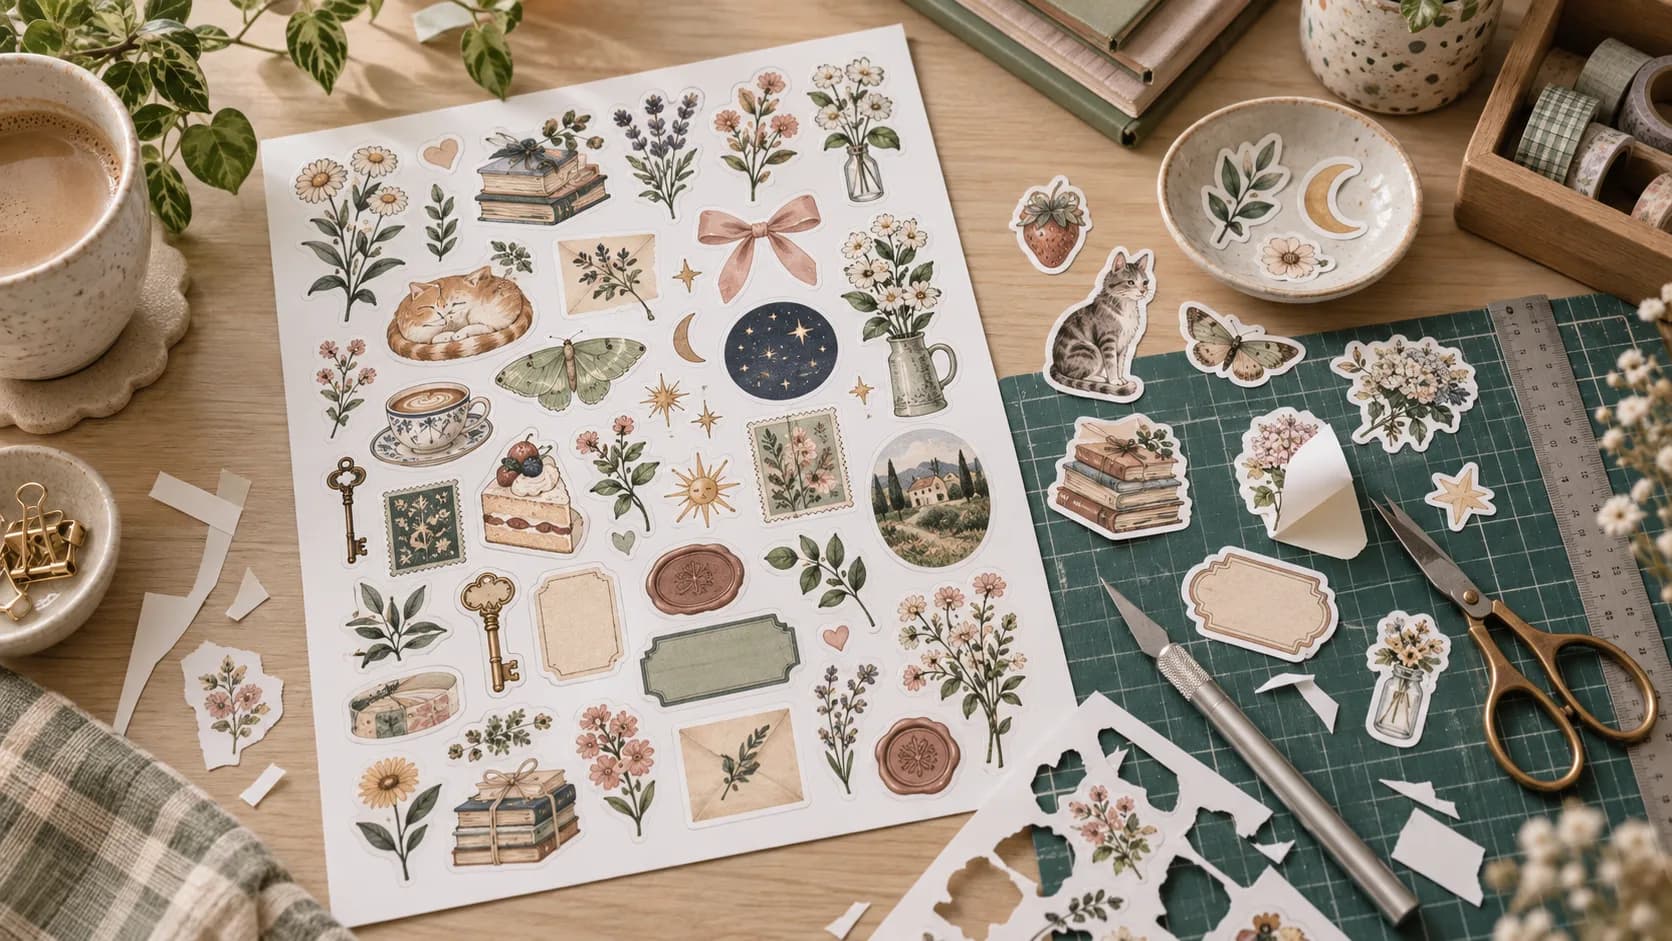
Printable stickers are one of the easiest ways to turn digital scrapbook elements into physical craft supplies. Print the designs you want on adhesive paper, cut around them, peel the backing and use them in scrapbook pages, junk journals, planners, cards or notebooks.
The process does not require professional equipment. A home printer, suitable sticker paper and a pair of scissors are enough to get started.
The main challenge is preparing the files correctly. Sticker designs need enough space around them for cutting, the printer needs to reproduce small details clearly, and your physical paper needs to match the way you plan to use the finished stickers.
This guide explains the complete beginner workflow.
You will learn:
- what printable stickers are,
- which files work best for home printing,
- how to choose sticker paper,
- how to arrange digital stickers on a printable sheet,
- which printer settings to start with,
- how to cut stickers cleanly by hand,
- how cutting machines fit into the workflow,
- and how to avoid the most common printing and cutting mistakes.
What Are Printable Stickers?
Printable stickers are digital designs that you print onto adhesive-backed paper and cut into individual pieces.
They can include:
- illustrations,
- characters,
- labels,
- florals,
- icons,
- decorative objects,
- frames,
- small phrases,
- themed embellishments.
Many digital scrapbook kits include sticker-style elements as transparent PNG files. The transparent area around the illustration makes it easier to place the element on a page digitally and also gives you flexibility when preparing a physical sticker sheet.
Once printed on sticker paper, those same decorative elements can become peel-and-stick embellishments for physical projects.
What Files Should You Use for Printable Stickers?
Transparent PNG files are especially useful for printable stickers.
A transparent PNG keeps only the visible illustration while the surrounding area remains empty.
That means you can:
- arrange several stickers on one page,
- move them closer together,
- resize individual designs,
- create your own sticker sheet,
- add your own cutting margin around each illustration.
Avoid printing from:
- screenshots,
- website thumbnails,
- compressed social media images,
- enlarged previews.
Use the original downloaded files whenever possible.
Do You Need a Special Sticker Printer?
No.
A normal home inkjet printer can work very well for printable scrapbook stickers.
What matters more is:
- print quality,
- compatible sticker paper,
- suitable printer settings,
- good source files,
- and allowing the ink to dry before cutting or handling the sheet.
You do not need to buy a dedicated sticker printer to begin.
What Sticker Paper Should You Use?
Sticker paper is available in several finishes.
The best option depends on the look you want and what your printer supports.
Matte Sticker Paper
Matte sticker paper is the easiest all-purpose choice for scrapbooking and journaling.
It works well for:
- planners,
- junk journals,
- scrapbook pages,
- notebooks,
- labels,
- writable stickers.
Advantages include:
- low glare,
- easy handwriting,
- a paper-like finish,
- good compatibility with watercolor and vintage artwork.
For most beginners, matte sticker paper is a practical place to start.
Glossy Sticker Paper
Glossy sticker paper creates a smoother, shinier surface.
It can work well for:
- bright character stickers,
- colorful illustrations,
- bold decorative elements.
However, glossy media may require a specific printer setting and can show reflections more easily.
Always check that the paper is designed for your printer type.
Clear Sticker Paper
Clear sticker paper can create the impression that the design is sitting directly on the page.
It works best when:
- the artwork has strong contrast,
- the surface underneath is fairly light,
- you intentionally want the background to remain visible.
Remember that standard home printers generally do not print white ink.
Any white area inside an illustration may therefore behave differently on transparent media than it does on white sticker paper.
Printable Vinyl
Printable vinyl is another option, especially when you want a smoother or more durable sticker surface.
Its behavior varies significantly between products, printers and finishes.
For ordinary scrapbook and journal stickers, you do not need printable vinyl to get started. Standard matte sticker paper is usually simpler.
How to Turn Digital Stickers into a Printable Sticker Sheet
If your stickers are supplied as individual PNG files, you can arrange several of them onto one printable page before printing.
You can do this in any layout or graphics application that lets you:
- create an A4 or US Letter page,
- import PNG files,
- resize them proportionally,
- position multiple elements,
- export or print the finished layout.
Step 1: Create your page
Choose the paper size you will physically put into your printer.
Common options are:
- A4,
- US Letter.
Step 2: Import the stickers
Place the individual PNG files onto the page.
Keep enough space between each design for cutting.
Step 3: Resize without distorting
Always resize proportionally.
Do not stretch a sticker horizontally or vertically just to fill space.
Step 4: Mix sizes intentionally
Not every sticker needs to be the same size.
For scrapbook pages, a useful sheet might contain:
- 2-3 larger focal stickers,
- several medium decorative elements,
- a group of smaller accents.
This gives you more variety when building a composition.
Step 5: Leave page margins
Do not place important elements too close to the physical edge of the paper.
Most home printers have a non-printable margin unless they support borderless printing for the selected paper size.
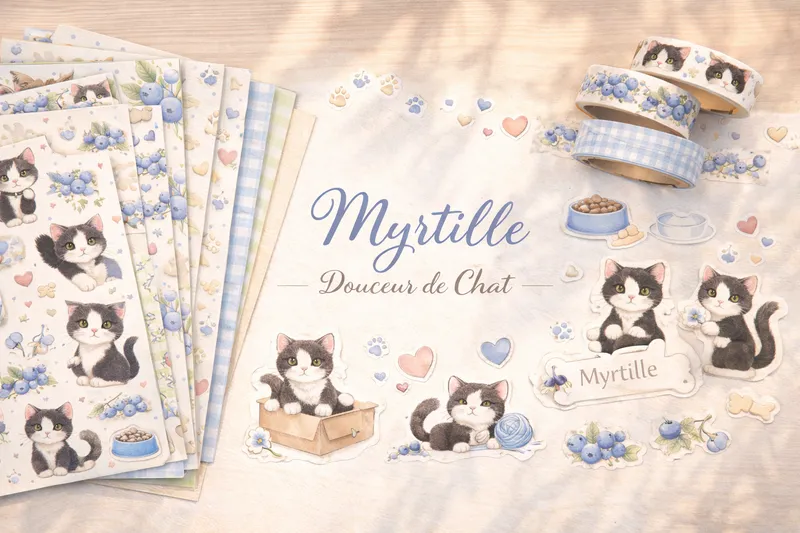
Character-led kits are particularly easy to turn into sticker sheets because larger characters can act as focal elements while drinks, flowers, paws or smaller accessories become supporting stickers.
How Large Should Printable Stickers Be?
There is no universal correct size.
Choose the size based on how the sticker will function.
Large focal stickers
Useful for:
- scrapbook page anchors,
- journal covers,
- card fronts,
- major decorative clusters.
Medium stickers
Useful for:
- supporting a photograph,
- planner decoration,
- page clusters,
- journaling spreads.
Small stickers
Useful for:
- corners,
- labels,
- repeated accents,
- filling small gaps,
- building visual rhythm.
Print one test sheet before preparing a large batch. A design that feels large on your monitor can look surprisingly small once printed.
Should You Add a White Border Around Printable Stickers?
A white border is optional.
Borderless cut
You cut directly along the edge of the illustration.
This creates a clean die-cut look, but intricate shapes can take longer to cut by hand.
White border
You leave a small amount of white sticker paper around the design.
This can:
- make hand cutting easier,
- protect delicate illustration edges,
- help detailed stickers stand out on patterned backgrounds.
The border does not need to be perfectly identical around every sticker for handmade scrapbook projects.
A small, visually consistent margin is usually enough.
Printer Settings for Printable Stickers
Start with the settings recommended for your actual sticker paper.
As a general baseline:
- use High or Best print quality,
- select the closest matching paper/media type,
- print from the original high-resolution file,
- avoid unnecessary enlargement,
- keep the layout at the intended scale.
If your design sheet already matches your physical page size, avoid unexpected automatic scaling.
For more detail on home printer settings, read How to Print Digital Scrapbook Paper at Home.
Always Print a Test Sheet First
Sticker paper costs more than ordinary printer paper, so test before using a full adhesive sheet.
You can first print your layout on plain paper.
Check:
- sticker size,
- spacing,
- page margins,
- overall composition,
- whether small details remain readable.
If the layout looks correct, move to sticker paper.
You can also print just a few designs on one sticker sheet before committing to a larger batch.
Let the Printed Sticker Sheet Dry
Do not start cutting immediately if the ink is still fresh.
Drying time varies with:
- printer,
- ink,
- paper coating,
- print quality,
- room conditions.
Handle the surface carefully until it no longer feels vulnerable to smudging.
This is especially important with coated or glossy media.
How to Cut Printable Stickers by Hand
Hand cutting is completely viable for scrapbook stickers.
You need:
- sharp scissors,
- good lighting,
- enough space around each element.
Rough-cut the sheet first
Instead of manipulating an entire A4 sheet around a tiny sticker, cut the page into smaller sections first.
Leave plenty of margin.
Turn the paper, not the scissors
For curved designs, keep your cutting hand relatively stable and rotate the paper with your other hand.
This usually produces smoother curves.
Leave a small border on detailed designs
If an illustration has:
- hair,
- leaves,
- tiny petals,
- thin branches,
- small accessories,
do not feel obligated to follow every tiny contour.
A simple white border often gives a cleaner result.
Use a craft knife for internal cuts only when needed
Some stickers may contain openings or difficult corners.
A precision knife and cutting mat can help, but most decorative scrapbook stickers do not require complex internal cutting.
Small food characters, treats and simple rounded shapes are useful practice material because they let you learn clean hand cutting without starting with extremely intricate silhouettes.
Kiss Cut vs Die Cut: What Is the Difference?
These terms describe how the sticker material is cut.
Kiss cut
Only the sticker layer is cut while the backing sheet remains intact.
The stickers stay together on one sheet and can be peeled individually.
This is common for planner-style sticker sheets.
Die cut
The sticker and backing are both cut around the design.
Each sticker becomes a separate physical piece.
If you are using scissors, you are effectively creating individual die-cut-style stickers.
A cutting machine can produce either workflow depending on the material, software and settings.
Do You Need a Cricut or Silhouette to Cut Printable Stickers?
No.
Cutting machines are useful if you:
- print many sticker sheets,
- want repeated cut shapes,
- prefer kiss-cut sheets,
- regularly work with detailed contours.
But they are optional.
For occasional scrapbooking and journaling, hand cutting is often faster than preparing a machine workflow.
If you do use a cutting machine, follow the manufacturer workflow for your exact machine and software. Material thickness, calibration and cut settings vary, so there is no single universal setting that works for every sticker paper.
Preparing Transparent PNG Stickers for a Cutting Machine
Digital scrapbook PNGs are not automatically machine-ready sticker sheets.
A typical cutting-machine workflow may require you to:
- import the PNG,
- size the artwork,
- create or adjust the cut boundary,
- arrange the elements,
- use the software's print-and-cut workflow,
- calibrate the machine if needed,
- test the cut depth on your sticker material.
If the original illustration contains complex edges, you may prefer to create a simpler offset border around it.
This is often easier to cut and gives the finished sticker a cleaner outline.
How to Avoid Wasting Sticker Paper
Sticker paper is easiest to waste when you print one small design in the middle of a full page.
Instead:
- collect several stickers before printing,
- arrange them tightly enough to use the page efficiently,
- keep practical cutting space between them,
- mix large and small elements to fill gaps.
You can also create themed sheets.
For example:
Kawaii sheet
- characters,
- food,
- hearts,
- flowers.
Vintage sheet
- labels,
- tickets,
- keys,
- stamps.
Celestial sheet
- moons,
- stars,
- crystals,
- small cosmic objects.
This makes it easier to print only the style you need for a project.
How to Use Printable Stickers in Scrapbook Pages
Stickers work best when they have a clear role.
1. Use one as the focal element
Place one larger sticker near:
- a photograph,
- a title,
- a journaling card.
Then use smaller stickers around it.
2. Build a cluster
Combine:
- one medium sticker,
- one small sticker,
- a label,
- a strip of paper.
Overlap them slightly.
The result feels more intentional than scattering unrelated stickers across the page.
3. Repeat one motif
Use the same small motif in several areas.
For example:
- three stars,
- several tiny flowers,
- repeated hearts.
Repetition helps the eye move through the page.
4. Use stickers to connect paper layers
A sticker can overlap two different papers or sit partly over a photograph mat.
That visually connects the layers.
5. Leave some unused
You do not need to place every sticker from the sheet onto one page.
A curated selection usually looks stronger.
Printable Stickers for Junk Journals
Sticker paper is optional in junk journaling.
The same PNG elements can also be printed on ordinary matte paper and glued manually.
That approach can be useful when you want:
- torn edges,
- distressed pieces,
- thinner layers,
- more control over adhesive placement.
Actual sticker paper is especially convenient for:
- labels,
- tiny embellishments,
- repeated decorative motifs,
- small elements that would be awkward to glue.
If you are building this kind of project, read Junk Journal Printables: What to Print and How to Use Them.
Printable Stickers for Planners
For planners, smaller stickers often work best.
Useful formats include:
- icons,
- mini illustrations,
- decorative corners,
- small labels,
- repeated motifs.
Before printing a full sheet, measure the usable area of your planner page.
A beautiful scrapbook sticker can still be too large for a compact weekly layout.
Printable Stickers for Cards
Stickers can act like pre-cut illustrations in handmade card making.
A simple formula is:
- folded cardstock,
- printed paper panel,
- one large sticker,
- two small decorative stickers,
- short message.
This gives you visual depth without requiring complicated paper construction.
Collections with many independent objects are especially flexible because a moon, crystal, star chart or decorative symbol can work as either a main card illustration or a small supporting embellishment.
Common Printable Sticker Problems
Stickers print too dark
Possible causes include:
- unsuitable media setting,
- overly dark source display,
- printer behavior on the selected paper.
Fix: test a small area and compare media settings supported by your printer and paper.
Stickers look blurry
Fix: use the original high-resolution file and avoid enlarging thumbnails or screenshots.
Sticker edges look rough
Fix: use sharper scissors, cut larger sections from the main sheet first and rotate the paper while cutting curves.
Small details are impossible to cut
Fix: leave a white border instead of following every tiny contour.
Sticker paper smudges
Fix: confirm that the paper is compatible with your printer and allow the sheet to dry before handling.
The sheet prints at the wrong size
Fix: check page dimensions and scaling before printing. Print a plain-paper test first.
Colors look different from the screen
Fix: expect some difference between a luminous display and printed ink. Test important designs before printing an entire batch.
Matte Sticker Paper or Regular Paper and Glue?
Both are useful.
Choose sticker paper when:
- you want quick peel-and-stick use,
- the elements are small,
- you are decorating planners,
- you want a ready-made sticker stash.
Choose regular paper when:
- you want torn edges,
- you prefer glue placement,
- you are building layered junk journal pages,
- you want thinner paper elements,
- you want to reduce sticker-paper use.
You do not need to turn every printable element into an adhesive sticker.
How to Store Printed Stickers
Keep unused stickers somewhere flat and dry.
You can organize them by:
- collection,
- color,
- theme,
- size,
- project.
For partially used sticker sheets, a simple folder or transparent sleeve makes it easier to see what remains.
Avoid printing a huge permanent sticker inventory before you know which styles and sizes you actually use.
A Good First Printable Sticker Project
For your first attempt, keep the sheet small.
Choose:
- 2 larger stickers,
- 4 medium stickers,
- 6-10 small accents.
Arrange them on one page, print first on plain paper and check the sizes.
Then print the final version on matte sticker paper.
Use the finished stickers in one scrapbook or journal spread rather than trying to build an entire sticker collection immediately.
That one project will teach you:
- what size you prefer,
- how much cutting margin you need,
- how your printer handles sticker paper,
- which elements are actually useful.
Printable Sticker FAQ
Conclusion: Start with One Sheet and Learn Your Workflow
Making printable stickers at home does not need to be complicated.
Start with original PNG files, arrange a small sticker sheet, test the size on ordinary paper, then print on compatible matte sticker paper. Cut simple shapes by hand and leave a small border when intricate contours become more trouble than they are worth.
Once you know which sticker sizes, paper finish and cutting style work for you, building new sheets becomes much faster.
For more themed elements to experiment with, browse Pixel Scrap’s printable scrapbook kits and turn your favorite digital illustrations into physical scrapbook stickers.