How to Make a Christmas Scrapbook Album: Easy Step-by-Step Tutorial
Make a Christmas mini scrapbook with cardstock and binder rings. Follow 10 easy steps for covers, photo layouts, printable papers and keepsake pockets.
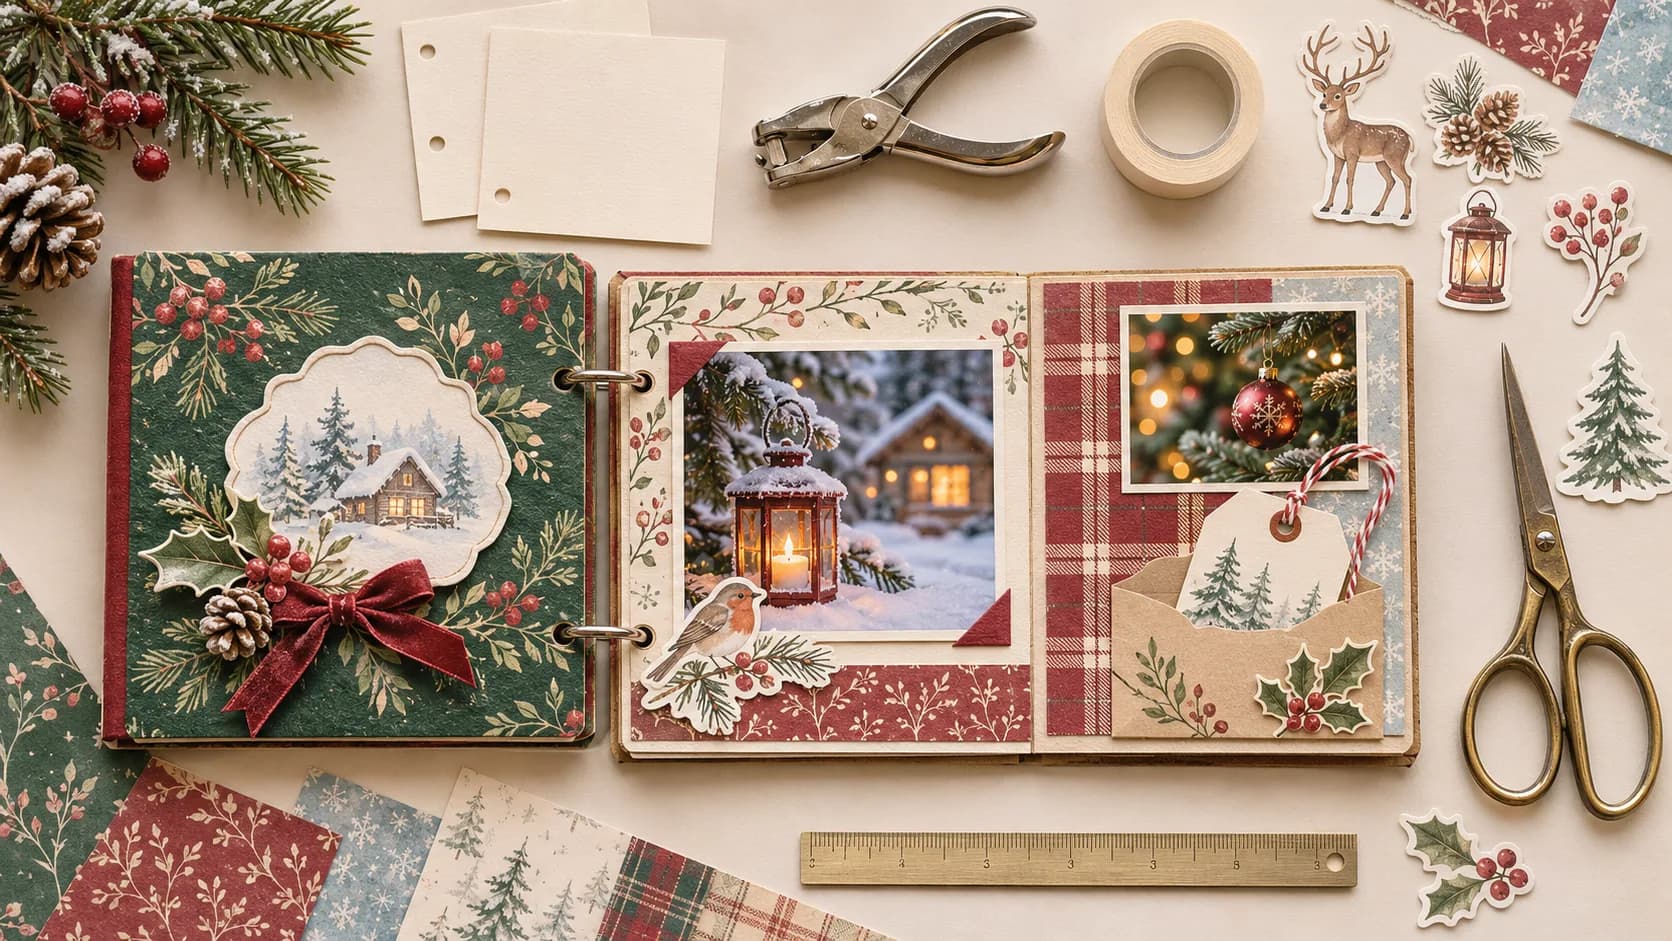
The holiday photos are easy to take and surprisingly easy to forget. A child hanging the first ornament, the kitchen covered in cookie flour, the view from the window on Christmas morning: those small moments deserve a home outside your camera roll.
In this guide, you'll make a Christmas scrapbook album from scratch, with no binding machine and no complicated paper engineering. We're building a small, ring-bound memory book using cardstock, printed photos, printable Christmas papers and a few cut-out embellishments.
Our 5 × 5-inch mini album has six inside leaves (12 sides to decorate), sturdy covers and two removable binder rings. You can finish the structure before December and add your holiday photographs as they happen — or fill it with memories from last Christmas.
What kind of Christmas scrapbook are we making?
A ring-bound mini scrapbook is one of the easiest album styles for beginners. You punch matching holes in individual pages, hold them together with two opening rings, and decorate each page independently. If you change your mind, you can rearrange the order without tearing apart a glued spine.
Prefer working in a ready-made album instead of making a ring binding? Learn how to plan and fill a scrapbook album.
For this project, here's the finished structure:
| Part | Size or quantity | Purpose |
|---|---|---|
| Front and back covers | Two 5 × 5 in squares | Protect the album |
| Interior pages | Six 5 × 5 in squares | Twelve usable sides |
| Cardstock | Four US Letter or A4 sheets | Two squares per sheet |
| Binding | Two opening rings, about 3/4–1 in | Hold the pages together |
| Photographs | Around 10–15 | Tell the Christmas story |
| Printable accents | A few papers, labels and stickers | Create a coordinated look |
Two 5-inch squares fit into the length of a standard US Letter sheet (8.5 × 11 inches) or an A4 sheet. If you're working in metric dimensions, 5 inches is 12.7 cm; a 14 × 14 cm variation also works on A4, but not two per US Letter sheet.
Don't worry about filling every side. Some pages can feature one photograph; others might hold a handwritten recipe, a drawing or a note to your future self.
Supplies for a DIY Christmas scrapbook album
You only need a short shopping list:
- Four sheets of 200–250 gsm cardstock (roughly 75–90 lb cover stock, but check the manufacturer's actual gsm) for pages and covers;
- a ruler, pencil and scissors or paper trimmer;
- a single-hole punch suited to your cardstock weight;
- two opening binder rings, ideally large enough to accommodate your finished decorated pages;
- matte printable Christmas scrapbook paper for backgrounds and photo mats;
- photo-safe corners or double-sided adhesive for attaching photographs;
- printable stickers, small journaling cards and a pen for dates and stories.
If you hope to keep the album for many years, look for photo-compatible, acid-free materials where possible. Test wet glues on scrap cardstock before using them; too much moisture can wrinkle paper and photo prints.
For more on print scale, paper types and colors, our guide to printing digital scrapbook paper at home covers the preparation in detail. This tutorial stays focused on actually making the album.
How to make a Christmas scrapbook album in 10 steps
Step 1 — Decide what story the album will tell
Do you want one Christmas Day, the entire holiday season or highlights from several years? Pick a clear direction before printing your decorative sheets.
For a first album, six little chapters are plenty: putting up the tree, baking, wrapping gifts, the Christmas meal, favorite people and one page of keepsakes. You can move these around later if your ring-bound pages allow it.
Choose two main colors and one accent. Evergreen, cranberry and cream make a classic palette. Icy blue, warm ivory and kraft brown feel quieter and more wintry. A limited palette makes mismatched photographs look like they belong in the same book.
Step 2 — Cut six interior pages and two covers
From each sheet of cardstock, cut a 5-inch-wide strip long enough for two 5-inch squares, then trim it into two 5 × 5-inch pieces. Repeat with your four sheets. You'll have eight equal squares in total.
Set aside six squares as interior leaves, plus one for the front cover and one for the back cover. Keep the leftover cardstock: narrow offcuts are excellent for date strips, photo mats and little labels.
Stack all eight pieces before you punch them. If one is slightly larger, trim it now; a neat stack makes the finished mini album much easier to handle.
Step 3 — Punch the holes and attach the binder rings
On every square, mark two points 1/2 inch in from the left edge. Place the upper hole 1 1/4 inches below the top edge and the lower hole 1 1/4 inches above the bottom edge. The holes will be 2 1/2 inches apart.
Punch your first square, check the position, then use it as a template for the rest. A single-hole punch makes this straightforward even if you don't own an adjustable binder punch.
Arrange the stack — front cover, six interior pages, back cover — and insert the two opening rings. Turn the pages to check that nothing catches.
Leave about 3/4 inch of breathing room next to the ring-bound edge. Photos, labels and thicker accents should sit clear of that zone. If the album is tight once the pages are decorated, move up to larger rings rather than forcing it shut.
Step 4 — Select and size your Christmas photos
Choose your favorite 10 to 15 photographs instead of trying to fit an entire phone gallery into the album. Include both wide scenes and small details: a festive table, the handwriting on a tag, a snow-covered path, a handmade cookie.
On a 5 × 5-inch page, a 3 × 4-inch portrait photo is a strong focal point. For a two-photo layout, smaller prints around 1 3/4 × 2 1/2 inches give you more room for labels and decoration.
Try making a photo mat: cut patterned cardstock approximately 1/8–1/4 inch wider than the photograph on each edge so it creates a visible frame. You don't need a raised foam layer; ordinary paper already provides a sense of depth.
Making the album before Christmas? Leave the photo spaces blank or use removable photo corners so you can slip new pictures into place later.
Step 5 — Decorate the front and back covers
Trim a printable Christmas paper square to 4 1/2 × 4 1/2 inches and center it on the 5-inch cover. This creates a narrow border of cardstock around the design. Mark or punch through the paper where your binder holes need to remain clear.
Choose one strong cover motif: a winter cottage, a cluster of evergreen branches or a few scattered stars. Add the year on a little label if you like. Keep large embellishments away from the ring edge.
The back cover can be much simpler. Repeating the same paper pattern in a smaller area is often enough to make the book feel finished.
Step 6 — Build the first scrapbook page around one photo
Start with a favorite image rather than a pile of stickers. Place the photo slightly to the right of center so it doesn't compete with the binding margin. Slide a paper mat behind it, add a small date label below and test one or two embellishments.
Before attaching anything, take a quick look at the page from a little distance. Can you see the picture first? If not, simplify the paper or move the decorations away from the subject.
Finally, write a short caption. It doesn't have to be poetic: “The first ornament went on at 7 a.m.” or “We made too many gingerbread cookies again” will mean something years from now.
Step 7 — Design a two-page Christmas photo spread
Once you've finished a single-photo page, try a pair of facing pages that document one event — decorating the tree on the left, then the finished room on the right.
Here's a repeatable layout:
| Left-hand page | Right-hand page |
|---|---|
| One 3 × 4 in feature photo | Two smaller 1 3/4 × 2 1/2 in photos |
| One narrow patterned paper strip | One journaling card |
| A small date label | Two coordinating stickers |
Use one matching visual detail across the spread: a paper pattern, a label shape or a shared accent color. That connection creates rhythm without making the pages identical.
If you want more layout inspiration beyond this album tutorial, visit our 15 Christmas scrapbook ideas for holiday pages, cards, tags and December journals.
Step 8 — Make a little pocket for holiday keepsakes
Some memories don't fit in a photograph. A gift tag with an unexpected message, a ticket from a Christmas market or a handwritten recipe can be just as meaningful.
Make a small pocket from patterned cardstock:
- Cut a rectangle approximately 3 × 2 1/2 inches.
- Place it clear of the ring-bound margin.
- Attach adhesive only along the two sides and bottom edge.
- Leave the top open and tuck in a few small cards, tickets or copies of keepsakes.
For irreplaceable originals, consider using archival storage instead of putting them directly against unknown inks or adhesive. This album is perfect for copies you can enjoy handling.
A tiny gift illustration or sticker makes the pocket feel festive without turning it into a bulky decoration.
Step 9 — Add journaling that brings the photos to life
A scrapbook isn't just a photo album with patterned paper. It's a place for the little details a camera doesn't capture: who baked the cake, what everyone laughed at, which song was playing as you decorated the tree.
Try writing who, where, when and one memorable detail. A few lines are enough. When a photograph is visually busy, use a plain journaling card so the words remain easy to read.
Making the book with children? Let them select their own motifs and share a favorite memory in their own words. Leave space for a drawing or a short handwritten note — years later, those imperfect little details may be your favorite part.
Step 10 — Check the finished album and store it safely
Flip through every page before calling the project done. Make sure the holes haven't torn, the rings still open easily, and the pocket is securely attached. Trim any stickers that catch on neighboring pages.
Avoid stuffing too many raised layers into the book. The paper may look flat on one page but add up quickly across twelve sides.
Store your Christmas scrapbook somewhere dry and away from direct sunlight. Keep digital backups of your photographs too; a handmade album is special, but it should never be the only copy of an irreplaceable image.
An easy 12-side Christmas scrapbook page plan
Need a little help deciding what goes where? Here's a practical order for your six interior leaves:
| Sides | Story idea |
|---|---|
| 1–2 | Opening photograph, year and a short welcome |
| 3–4 | Decorating the tree and getting the house ready |
| 5–6 | Baking, favorite recipes and small family traditions |
| 7–8 | Christmas Eve or Christmas morning |
| 9–10 | Favorite people and candid moments |
| 11–12 | A keepsake pocket and closing note |
If you're documenting a baby's first Christmas, replace the recipe spread with milestones and portraits. For a cozy couple's album, try a movie-night page, a favorite winter walk or a handwritten note. The structure is yours to adapt.
Three Christmas scrapbook styles using printable papers
Classic Christmas memory book
Think forest green, muted red, cream and kraft details. Use one floral or evergreen paper as the cover and repeat it in small strips throughout the album. This style works beautifully with family portraits and handwritten recipes.
Soft winter mini album
Choose icy blue, ivory, snowfall illustrations and quiet layouts. It suits outdoor photographs, cozy evenings and little details like candles or string lights. Keep a few pages mostly white for breathing room.
Playful Christmas scrapbook for kids
Use cheerful toy illustrations, tiny presents, candy canes and warm colors. Leave a page for a drawing and another for a child to choose their own stickers. When crafting together, use age-appropriate scissors and supervise small pieces.
You can explore printable scrapbook packs for matching papers and motifs, or choose a smaller selection using the custom pack builder.
Common mini scrapbook mistakes to avoid
Decorating before punching the binding holes
The holes may cut into your photo mat or an important illustration. Build and punch the structure first, then decorate around the binding margin.
Printing too many designs at once
Choose the photos and page layouts first. Print only the papers you know you'll use, then go back for extra accents if you need them.
Covering every inch of every page
Leave room for photographs and words. A quiet background makes a favorite image feel more important than five competing patterned layers.
Forgetting dates and little stories
You might remember exactly why a photo mattered this year. You may not remember the same detail in five years. A date, a name or one funny sentence is worth saving.
FAQ: How to Make a Christmas Scrapbook Album
Make a Christmas scrapbook you'll actually want to open again
A meaningful Christmas scrapbook doesn't need expensive equipment or elaborate page engineering. With a few cardstock squares, two binder rings, the right photos and a restrained selection of printable papers, you can create a little book that feels unmistakably yours.
Prefer to record the season one day at a time? Try our December memory journal ideas and daily prompts.
Start with the cover and your first two pages. Fill the rest as the memories happen. When you're ready for more seasonal patterns and cut-out illustrations, browse Pixel Scrap's printable kits or build a custom selection of designs for the next chapter of your album.