Interactive Scrapbook Pages: 8 Easy Pockets, Flaps & Hidden Details
Learn 8 easy interactive scrapbook techniques with step-by-step pockets, flip-up flaps, gatefolds, accordion inserts and photo waterfalls you can make at home.
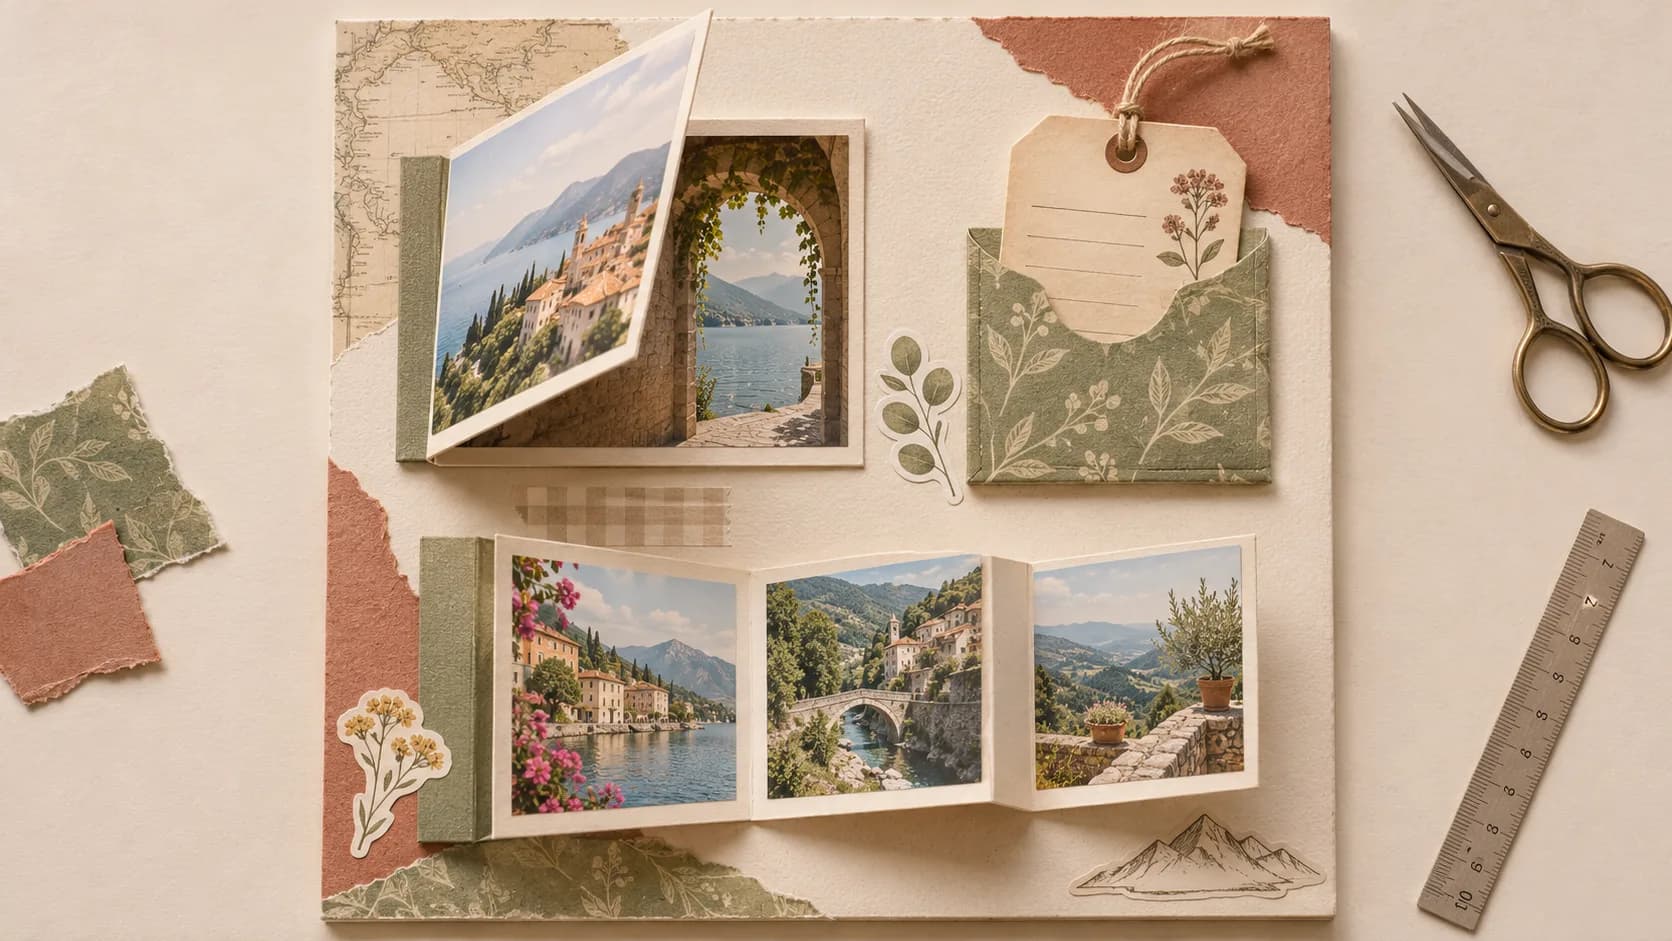
A scrapbook page can hold more than the photographs you see at first glance. Lift a flap and discover a note. Pull a card from a pocket and find the date of a favorite trip. Unfold a strip of paper and turn one moment into a short sequence of memories.
That's the appeal of interactive scrapbook pages: they give someone a reason to touch, open, unfold, and explore a story. And the best part is that you can make most of these little moving pieces with paper, scissors, a ruler, and adhesive. You don't need a cutting machine or an elaborate mini-album kit.
This beginner-friendly guide walks through eight working paper mechanisms, with practical measurements for an 8 × 8-inch scrapbook page. It focuses on what moves, opens, or holds a removable keepsake—not on the overall arrangement of photographs. For balanced photo compositions, see our 20 easy scrapbook page layout ideas. To plan an entire memory book, start with our scrapbook album tutorial.
What makes a scrapbook page interactive?
An interactive page includes an element designed to move or reveal information. It might be a card tucked into a pocket, a photograph covering a hidden message, a three-panel foldout, or a stack of photos that lift one after another.
The movement should have a purpose. On a travel layout, a pocket might hold a copy of a train ticket and a handwritten note. On a birthday page, a flap can keep a private message beneath a portrait. On a family page, a small accordion can show three pictures that tell a beginning, middle, and end.
| Paper element | How it works | Best for |
|---|---|---|
| Top-opening pocket | Slide something in and out | Tickets, tags, small prints |
| Corner pocket | Tuck an item beneath a diagonal edge | Cards, keepsakes |
| Belly band | Slide a card under a loose strip | Removable journaling |
| Flip-up flap | Lift a covered photo or note | Hidden photos and messages |
| Gatefold doors | Open two panels toward the sides | A surprise reveal |
| Accordion | Unfold several panels | A short photo story |
| Photo waterfall | Lift overlapping flaps one by one | A sequence of images |
| Envelope | Open and retrieve contents | Letters and delicate paper keepsakes |
You don't need every mechanism on a single layout. One thoughtful interactive detail is often enough to make a scrapbook page memorable.
Supplies and setup: keep the first attempt simple
Work with an 8 × 8-inch sheet of cardstock or a similarly sized area in an album. Gather a few scraps of patterned paper, a pencil, ruler, scissors, double-sided tape or paper-friendly glue, and a few practice cards. A bone folder can give cleaner creases, but it isn't essential.
Digital printable papers and sticker designs can help decorate the finished pieces, but you'll still need physical paper and adhesive to build the mechanisms. If you're putting your supplies together for the first time, check our beginner scrapbook supplies guide.
Before you attach anything permanently, follow three rules:
- Score or crease before gluing. Make sure every flap opens in the direction you intended.
- Keep the opening clear. If a pocket should open at the top, do not run glue along that top edge.
- Test the moving part first. Insert the tag, flip the photograph, and check the binding clearance before the adhesive sets.
All dimensions below are starting points, not mandatory templates. Leave room near your album's rings, spine, or page protector edges. For irreplaceable photographs or documents, use copies when possible and choose materials appropriate for long-term photo storage.
1. A basic top-opening paper pocket
Skill level: very easy · Best for: tickets, note cards, and small photos
This is the simplest functional scrapbook pocket. Three edges attach to your page while the top stays open, creating a place for loose memories.
Cut, fold, and attach
- Cut a piece of paper measuring 5 × 3 inches.
- Draw light guide lines ¼ inch in from the left, right, and bottom edges.
- Fold those three narrow margins toward the back.
- Snip away excess paper at the lower corners so the folded tabs don't bunch up.
- Apply adhesive only to the three folded tabs and press them onto your page.
- Let the adhesive set, then test the opening with a card about 3 × 2 inches.
Your finished pocket face is approximately 4½ inches wide by 2¾ inches high. Use a quiet pattern or solid cardstock so the inserted tag remains the focal point.
Common mistake: covering the entire back with adhesive. That creates a decorative paper panel, not a pocket.
Try this: leave a small tab visible above the opening. Readers will instinctively know there's a keepsake to pull out.
2. A diagonal corner pocket
Skill level: easy · Best for: a tag, small note, or ticket corner
A triangle pocket uses hardly any space and looks especially natural beside a photograph or journaling area.
- Cut a square of sturdy paper measuring 3½ × 3½ inches.
- Cut it diagonally into two right triangles. Keep one for your pocket.
- Place its two straight edges against the bottom and side of the area you've chosen.
- Attach only those two straight edges, using a narrow strip of adhesive.
- Leave the diagonal edge open and slide in a small removable card.
Check the card's fit before attaching the pocket. A paper corner should gently hold the item; you shouldn't have to bend a photograph to get it inside.
Preservation note: for valuable original prints, photo-safe corner mounts are a better choice than improvising an adhesive pocket directly against the photograph.
3. A belly band for removable journaling
Skill level: very easy · Best for: a journal card that can be read on both sides
A belly band is a decorative strip attached at each end, leaving a tunnel underneath. It works like a paper bookmark holder rather than a closed pocket.
- Cut a strip 1¼ × 6¼ inches.
- Fold about ⅜ inch at each end.
- Glue just those two end tabs to the page.
- Leave the strip's center unattached and slide a journaling card beneath it.
- Add a small flat decorative detail in the middle if desired.
The visible band is about 5½ inches long. Choose a journaling card slightly narrower than the available passage and check that it slides smoothly.
A great use for this technique is private or extended journaling. Write a short caption on the front of the card and the full story on the back. Visitors can pull it out to read the rest.
Avoid: raised embellishments right where the card needs to slide. Thick stickers or dimensional flowers can snag the insert.
4. A flip-up photo flap
Skill level: easy · Best for: two photos in one space or a hidden note
The flip-up flap is a simple way to show one photograph on the outside and another beneath. It also works beautifully for a surprise message or an extra piece of journaling.
Make a 4-inch-wide flap
- Cut a rectangle of paper 4 × 5¼ inches.
- Score a line ½ inch from the top edge.
- Fold that half-inch strip to the back to form the hinge.
- Attach only the hinge to your scrapbook page.
- Put a photo or title on the outside; place a second photo or handwritten note underneath.
- Check that the flap lifts comfortably without rubbing against the album binding.
The movable panel measures about 4 × 4¾ inches. Lightweight cardstock holds up well, while very thick board can make the fold stiff.
Make it discoverable: a small tab or gently rounded lower corner signals that the piece should be lifted. A flap without a visual clue can look like an ordinary decorative mat.
5. Double gatefold doors for a reveal
Skill level: moderate · Best for: a hidden central picture or a before-and-after moment
A gatefold uses two panels that open like doors. It's an effective way to create a reveal without adding a complicated mechanical slider.
- Lightly mark a central area 4 × 4 inches on your page.
- Cut two pieces of paper measuring 2½ × 4 inches.
- Score each piece ½ inch from one vertical edge. Each door will have a visible width of 2 inches.
- Attach one hinge outside the left edge of the marked area and the other at the right edge.
- Close both doors to make sure they meet at the center without overlapping.
- Decorate the outer faces, then put a photograph or written message in the space they reveal.
Leave a hairline of space between the doors rather than forcing them against each other. Paper expands slightly with adhesive and handling.
Variation: add a tiny circular paper pull on one edge. You don't need magnets, brads, or elaborate hardware to make the two doors feel intentional.
6. A three-panel accordion insert
Skill level: easy · Best for: three stages of a journey or an extra mini photo sequence
An accordion is one long strip with alternating folds. It gives you several small surfaces without requiring a new bound page.
- Cut a strip 9 × 3 inches. This fits on a standard US Letter sheet.
- Score at 3 inches and 6 inches.
- Fold one crease forward and the other backward to create three 3 × 3-inch panels.
- Add a small photograph, word, or memory to each panel.
- Attach only the back of the first panel if you want the accordion fixed to the scrapbook page.
Or leave it removable and slip the closed accordion into a sufficiently roomy pocket. Either way, open and close it several times before decorating.
What to tell: one panel for the departure, one for the highlight, and one for what you remember most. The format naturally encourages a short sequence instead of a crowded collage.
Common mistake: gluing both ends to the base page. Unless you're intentionally designing a different mechanism, that will stop your accordion from opening.
7. A three-photo lift-up waterfall
Skill level: moderate · Best for: a short sequence of pictures
The word waterfall is used for several scrapbook mechanisms. This beginner version is a stack of overlapping lift-up cards, not a pull-tab device that automatically turns each photo.
Prepare the cards
Cut three rectangles measuring 3 × 3½ inches. Score a hinge ½ inch from the top of each card. The face of each flap is therefore about 3 × 3 inches.
Assemble from bottom to top
- Mark three hinge positions along a vertical line, separated by approximately ¾ inch.
- Attach the lowest flap first using only its top hinge.
- Place the middle flap a little higher and attach its hinge.
- Attach the top flap last, above the others.
- With the flaps closed, each lower card should leave a narrow visible strip. Lift the top one to reveal the next.
- Make sure the photographs and decorations don't interfere with the hinge lines.
The exact spacing depends on your design, so test with scraps before making the final cards. The main idea is that each flap lifts independently and reveals the one beneath it.
For your first try, use three small copies of photos rather than irreplaceable prints. A paper practice version quickly shows whether the hinges are spaced comfortably.
8. An envelope for letters and hidden keepsakes
Skill level: very easy · Best for: a short letter, child's drawing, or small paper memento
Sometimes the easiest interactive element is a small envelope you already have. It adds an emotional layer to a page without requiring you to engineer a new fold.
- Choose a thin, flat envelope that is smaller than your main photograph.
- Decide whether its flap should open upward or outward, and test the clearance.
- Glue the envelope's back to the scrapbook page, leaving its closure untouched.
- Slip in a short note, a ticket copy, or a little folded drawing.
- Add a subtle tab or label if the opening isn't immediately obvious.
Avoid filling the envelope with thick objects. Scrapbook pages can warp or make the album hard to close when too many bulky layers sit in one place.
A vintage letter or personal archive theme can be beautifully supported by printable labels and coordinated decorative artwork. Remember that Pixel Scrap packs contain digital files to print, not physical envelopes or the keepsakes inside them.
Make one interactive travel page: a complete mini project
Instead of putting all eight techniques on the same page, combine three small interactive details with a single clear memory.
Suggested layout for an 8 × 8-inch page
- Upper left: a printed photograph around 3 × 4 inches.
- Upper right: a flap of roughly 3 × 4 inches, hiding a note or second photo.
- Lower area: a pocket around 4 inches wide, holding a small ticket or journaling tag.
- Decoration: one narrow strip of patterned paper and two restrained embellishments.
Assembly order
- Arrange the photograph and flap without glue, allowing roughly ½ inch of outer margin if your binding permits.
- Open the flap fully and make sure it doesn't collide with the photo or page edge.
- Measure the space left at the bottom before cutting your pocket.
- Attach the flap hinge first, then the pocket, and finally the visible photograph.
- Test the pocket with a scrap card; trim the insert if it feels too tight.
- Add the patterned paper accent, date, and caption only after the moving parts work.
This sequence matters. Build and test the mechanism first; decorate it second. It is much easier to embellish a flap that opens smoothly than to repair a hinge blocked by a sticker.
For a travel page, coordinated printable illustrations can bring the paper elements together visually. Choose them around your photographs and personal memories, rather than using decoration as a substitute for the story.
How to add dimension without making your album too thick
An interactive scrapbook page already has visual depth because parts move. You rarely need heavy foam layers or raised embellishments on every flap.
Use a firm page base for support, but choose paper that creases easily for hinges and moving inserts. Spread thicker elements across different pages, and close your album regularly while you work. If the book begins to bow outward, simplify the next page rather than adding more bulk.
If your challenge is primarily where to place photographs, titles, and decorative paper, use our 20 beginner scrapbook layouts. If you're interested in the distressed-paper look and expressive collage of vintage journals, explore our introduction to junk journaling. This tutorial has a narrower purpose: making paper interactions you can actually use.
Six common interactive scrapbook mistakes
| Problem | Likely cause | How to fix it |
|---|---|---|
| The card won't slide into the pocket | Opening too tight or adhesive inside | Widen the pocket slightly or trim the card |
| A flap won't open properly | Hinge glued flat or facing the wrong way | Test the score and attach only the hinge tab |
| Gatefold doors overlap | No clearance allowed | Leave a narrow gap between the doors |
| Paper wrinkles or warps | Too much wet glue or paper too thin | Use less adhesive and test with scraps |
| The finished album won't close | Too many raised elements | Alternate interactive and flatter pages |
| Nobody notices the hidden detail | No visible pull or opening cue | Add a small tab or exposed card edge |
Don't aim to make your first mechanism impressive. Aim to make it easy to open, sturdy enough to handle, and meaningful to the memory you're preserving.
FAQ: interactive scrapbook pages
Start with one small surprise
For your next layout, ask what you want the reader to discover, not how many mechanisms you can fit on the page. A tucked-away train ticket, a photograph revealed by a flap, or three images unfolding in order can make a personal memory feel much more vivid.
Practice one pocket or flap on scrap paper, then repeat it on your finished page. Add your photos and journaling before choosing decorative accents. If you want coordinated printable motifs, browse the Pixel Scrap digital packs and select only what supports your story.