20 Easy Scrapbook Page Ideas for Beginners: Simple Photo Layouts to Try
Try 20 easy scrapbook page layout ideas for beginners, with one to four photos, simple sketches in words, journaling tips and ways to arrange your memories.
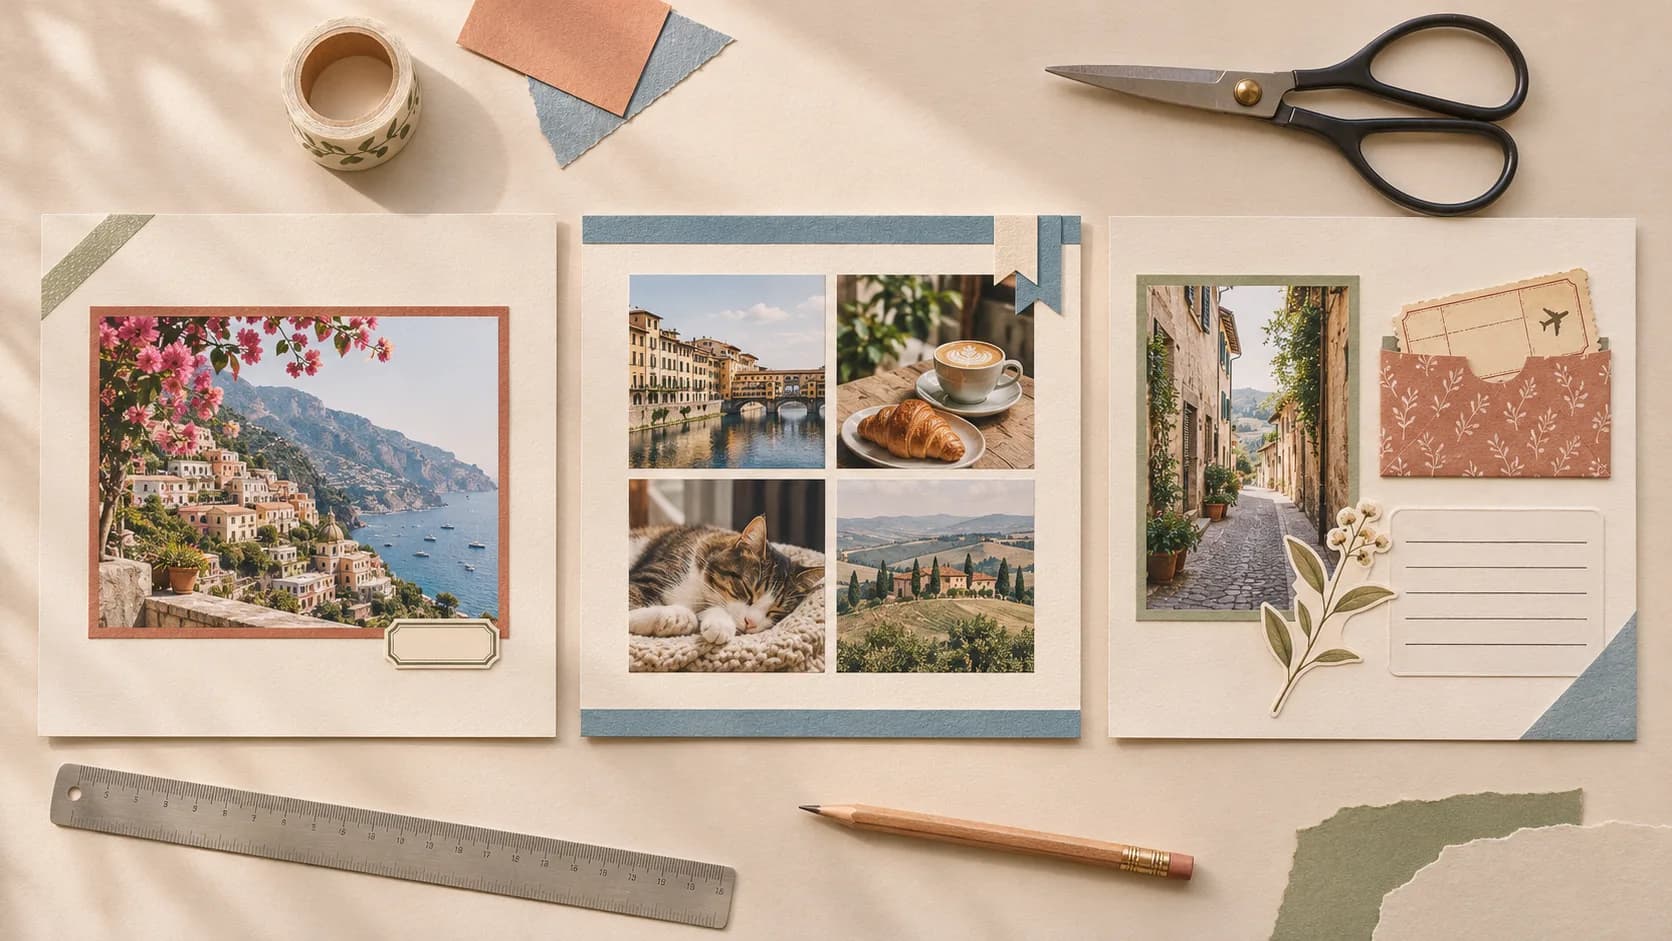
You have a favorite photo, a few pieces of patterned paper, and an empty scrapbook page. But how do you arrange everything so that it looks intentional rather than crowded?
These 20 easy scrapbook page ideas for beginners focus on something practical: where to put your photographs, title, journaling, and small decorative details. They're organized by photo count, so you can choose a layout based on what you actually have instead of trying to recreate a complicated inspiration photo.
Each design includes a clear arrangement, a type of memory it suits, and one simple variation. You can make these pages with a ruler, scissors, paper, and photo-safe adhesive—no electronic cutting machine required.
This is a guide to individual page layouts, not to assembling an entire scrapbook album. If you're planning a complete photo book, our step-by-step scrapbook album tutorial covers organizing and connecting the pages. If you still need your first supplies, start with scrapbook supplies for beginners.
A simple setup for all 20 scrapbook layouts
To make comparisons easy, imagine a square 8 × 8-inch scrapbook page. You can work on loose cardstock or an existing scrapbook page. Adjust all dimensions to the actual space available, especially around binding holes or the spine.
You'll need:
- One to four photo prints (or duplicates of valuable originals).
- One solid background sheet and a small selection of patterned-paper scraps.
- A ruler, pencil, scissors, and photo-safe adhesive appropriate for your materials.
- A pen for dates, names, and short memories.
- Optional printable stickers and labels for finishing touches.
For an 8 × 8-inch page, a 4 × 6-inch landscape photo can be your main image. Two smaller prints around 3 × 4 inches, or four small squares, are easier to arrange when you also want space to write. These are examples, not mandatory templates; test your exact prints on the page before cutting anything.
The three-part formula that makes pages easier
Start with one visual focus, then give it a title and a short personal note. After those three parts work together, add a decorative paper strip or a small embellishment cluster if the page needs it.
Lay everything out without glue first. If the stickers grab your attention before the photograph does, scale them back. The memory—not the decoration—should be the star of a beginner scrapbook layout.
Not sure what size to print your pictures? Start with our scrapbook photo size and cropping guide, then choose a layout once your prints are ready.
5 easy scrapbook page ideas with one photo
A single photo gives you the most room to experiment with spacing, borders, and journaling. These are great first projects because you won't be juggling several competing images.
1. The centered hero photo
Best for: a meaningful portrait, a favorite vacation photograph, or a family moment.
Put one 4 × 6-inch landscape photo near the middle of your 8 × 8-inch page. Mount it on a slightly larger piece of solid cardstock to create a narrow border. Place a short title above it and a date near the lower-right corner. Leave the outer corners mostly empty.
Why it works: the eye goes straight to the image. The border adds definition without requiring fancy techniques.
Try this variation: shift the photo toward the left and write a two-line caption in the open space on the right.
2. A bold horizontal paper strip
Best for: a picnic, a beach walk, or any photograph with a relaxed atmosphere.
Cut a patterned-paper strip about 2 inches tall and run it across the lower third of the page. Set your photo so it slightly overlaps the strip. Keep the title in an upper corner and add a small location label near the image.
Layout tip: choose a subtle pattern when the photograph already has lots of color and detail.
Try this variation: layer two thinner strips—a plain one behind a patterned one—to create depth without extra embellishments.
3. The off-center portrait with breathing room
Best for: a vertical portrait, a quiet moment, or a photograph of one special person.
Place a 3 × 4-inch portrait print on the right side of the page. Keep the left side open for a short memory, roughly three sentences, and a small title at the top. Add one sticker where the photograph and writing areas meet.
Why it works: empty space becomes part of the design. A scrapbook page doesn't need decoration in every corner to feel finished.
Try this variation: write on a cream journaling card if the background paper makes handwriting difficult to read.
4. The wide landscape photo
Best for: mountain views, city skylines, and scenic road trips.
Use a panoramic print approximately 6 × 3 inches, or a copy cropped carefully so no important subject is lost. Align it in the top half of the page. Below it, add a place name, one short description, and a slim strip of paper that echoes a color from the sky or landscape.
Layout tip: avoid framing a wide photo with a very busy pattern. The view already creates its own visual rhythm.
Try this variation: put three tiny words underneath—one for the place, one for the weather, and one for how you felt.
5. One photo and a keepsake pocket
Best for: concerts, museums, sporting events, and days out.
Place your photograph in the upper half of the page. Fold a small piece of cardstock into a flat pocket and attach it so the top stays open. Tuck in a copy of a ticket, a tiny note, or a receipt you want to remember. Use one caption to connect the object to the photograph.
Important: keep the pocket thin if the page will eventually go into a bound album or protective sleeve.
Try this variation: attach a label to the pocket describing what it holds, so someone can enjoy the page without pulling the keepsake out.
5 simple scrapbook layouts with two photos
Two pictures can tell a tiny story together. Decide whether they have equal importance or whether one should clearly take the lead.
6. Two photos, side by side
Best for: sibling portraits, two views of a place, or photos taken at the same event.
Use two matching prints, around 3 × 4 inches each. Line them up side by side with an even gap. Add one shared title above both images and a single caption below, rather than creating separate decorated frames for each photo.
Layout tip: prints with a similar color mood naturally feel connected.
Try this variation: keep both photographs in full color but add a single solid-color mat behind the pair to unify the composition.
7. One big moment, one tiny detail
Best for: birthdays, meals, celebrations, or little everyday discoveries.
Position one 4 × 6-inch photo slightly left of center. Add a small square detail photo near the lower-right side without covering the important part of the main image. Use a shared title and a brief line that explains the smaller picture.
Why it works: the large photograph communicates the event; the smaller one adds the detail people might otherwise miss.
Try this variation: mat only the detail photo in a contrasting paper color to make that visual relationship more deliberate.
8. The before-and-after layout
Best for: a home project, a garden, a recipe, or a craft transformation.
Use two photos with the same orientation and similar framing. Place them next to each other or stack them vertically. Label them Before and After, then add one sentence about the change. Keep the surrounding decorations minimal because the comparison does most of the storytelling.
Layout tip: matching camera angles help viewers understand what changed.
Try this variation: use Morning / Evening or Departure / Arrival when you're documenting a sequence rather than a transformation.
9. A gentle staggered photo pair
Best for: candid portraits, vacation snapshots, or two funny moments.
Place two smaller photographs across the middle of the page, but position one slightly lower than the other. Give each photo a slim solid-paper mat. A short horizontal paper strip can connect the pair. Write the title in the open corner and a two-line caption beneath the arrangement.
Be careful: a tiny overlap is enough. Don't hide an important face or gesture just to create an angled composition.
Try this variation: keep both photos straight and let the vertical offset provide all the movement.
10. Two stacked photos plus a journaling column
Best for: a memory with a funny conversation, a meaningful quote, or a story worth telling.
Stack two small landscape prints in the left two-thirds of the page. Reserve the right third for four to six lines of journaling and a date. Use one narrow dividing line or strip instead of heavy boxes around every section.
Why it works: the eye moves naturally between the pictures and the words, almost like a small magazine feature.
Try this variation: replace a longer paragraph with three quick facts: what happened, who was there, and what you want to remember.
5 scrapbook photo layouts for three or four pictures
With more photos, alignment matters more than extra decoration. A grid or a clear photo hierarchy can make several memories feel like one coherent page.
11. The three-photo story strip
Best for: a walk, a quick craft project, or a sequence from an afternoon.
Arrange three matching small prints in one horizontal row, leaving even gaps between them. Put a short title above the strip, then one word or time beneath each image. Keep the background nearly plain so the story reads from left to right.
Layout tip: choose three photos that show different stages rather than three almost identical shots.
Try this variation: rotate the whole composition into a vertical strip for a narrow notebook page.
12. One large photo and two supporting pictures
Best for: a day trip, a family dinner, or a visit to somewhere new.
Give one photograph about half the overall photo area. Stack two smaller prints next to it, aligned to create one tidy rectangle. Leave a band at the bottom for a date and a short description of the event.
Why it works: the biggest image tells viewers where they are, while the two smaller pictures add context and detail.
Try this variation: move the main photograph to the right and stack the smaller prints on the left to change the direction of the page.
13. The classic four-photo grid
Best for: a weekend recap, four funny faces, or stages of a project.
Crop or print four square photos around 2.75 × 2.75 inches and place them in a clean 2 × 2 grid. Keep all outer edges aligned and the gaps even. Add a title at the top and one date tag beneath the grid. A tiny decoration near the title is plenty.
Layout tip: mix close-ups and wider scenes so the group doesn't feel repetitive.
Try this variation: replace one photo with a square journaling card using the same dimensions.
14. The feature photo and three detail shots
Best for: a party, a memorable meal, a trip, or an event that deserves more than one image.
Position a large landscape photo in the upper portion of the page. Below it, line up three equally sized small pictures: perhaps a smile, a tiny object, and a detail of the location. Add a compact date label beside the title. Keep all photo edges consistently aligned.
Why it works: the big scene introduces the story, and the lower row encourages a second, closer look.
Try this variation: swap one of the three small photos for a square note containing a short quote.
15. The mini contact-sheet collage
Best for: candid snapshots from a market, a party, or an ordinary afternoon.
Group four small photographs into a tight 2 × 2 block, like a miniature contact sheet. Put the whole block on a slightly larger piece of plain cardstock, leaving plenty of blank background around it. Beneath the photos, write one line about the atmosphere of the day rather than a separate caption for each image.
Layout tip: photos with a similar mood or lighting make the contact-sheet effect easier to read.
Try this variation: replace one square with a flat ticket or a tiny place card for a more personal collage.
5 memory-first scrapbook page ideas
Scrapbooking isn't just about arranging photographs. Sometimes a ticket, a handwritten note, or an ordinary detail tells the story as vividly as the pictures. These layouts give those elements a meaningful place.
16. A travel route with a map and ticket
Best for: train journeys, weekend trips, and favorite vacation stops.
Put a main photo on the left half of your page. On the right, add a small map fragment and a copied ticket underneath it. Connect the pieces with a thin line, an arrow drawn by hand, or a paper strip. Place the location and date in the upper-right corner.
Layout tip: you don't need the entire route. One location name and one ticket can tell enough of the journey. Use a copy when an original thermal-paper receipt or ticket is fragile.
Try this variation: replace the map with a short list of three places you visited.
The Vintage Travel printable collection can add coordinated paper details to a page built around your own travel photos and keepsakes.
17. A tiny timeline of one day
Best for: birthdays, celebrations, and full days with several memorable stages.
Draw a light vertical line down one side. Add three times or milestones along it. Across from each point, arrange a small photo and a few words. Keep one title at the top and a closing thought at the bottom.
Why it works: the timeline creates a reading order automatically. It's an easy way to tell a story without designing a complex collage.
Try this variation: replace times with Before / During / After for an event that didn't follow a strict schedule.
18. Three small everyday joys
Best for: ordinary weeks, gratitude pages, or a quiet month-in-review.
Choose three little photographs: a cup of coffee, morning light through a window, a flower in a jar. Arrange them in a loose triangle and write one word or detail near each. Finish with a personal sentence along the bottom. Use a calm solid background and very few embellishments.
Layout tip: the photographs don't need to document a big event. This kind of scrapbook page makes ordinary moments worth remembering.
Try this variation: repeat the same structure every month to build a gentle visual series.
19. A handwritten letter or family recipe page
Best for: family traditions, favorite recipes, or someone whose words you want to keep.
Place a small photo in an upper corner. Use the central area for a short copied excerpt from a family letter, recipe, or personal note. Mount the writing on plain paper so it's easy to read, and add the writer's name or the date nearby.
Layout tip: scan or copy an irreplaceable old letter rather than gluing the original. The memory matters more than attaching the actual document.
Try this variation: replace the letter with a small card titled Three Things I Want to Remember.
For writing-led scrapbook pages with an archival feel, the Secret Library printable collection offers complementary visual details.
20. The minimal photo-and-quote page
Best for: an emotional portrait, a significant landscape, or a moment that needs very little decoration.
Place one medium-sized photograph in the upper third of the page. Beneath it, write one sentence in your own words about why you remember that moment. Add a date and, at most, one small paper accent. Let the surrounding background remain visible.
Why it works: the photograph and your words do the storytelling together. A minimal layout isn't incomplete just because it has fewer embellishments.
Try this variation: make the photo black and white against warm cream paper, but keep the personal caption in your own handwriting.
Which scrapbook page layout should you try first?
Pick the design based on the number of photos and what you want to tell, not on how impressive an inspiration photo looks.
| What you have | Try these ideas | Main goal |
|---|---|---|
| One important photo | 1 or 20 | Keep the attention on the memory |
| One vertical portrait | 3 | Combine an image and personal words |
| Two connected photos | 6 or 8 | Show a relationship or a change |
| Two photos and a story | 10 | Make journaling part of the design |
| Three small pictures | 11 or 18 | Tell a sequence or capture a mood |
| Four images | 13 or 15 | Organize several moments neatly |
| Photos and a travel ticket | 5 or 16 | Preserve a physical memory |
| A picture and an old note | 19 | Keep words and their context together |
Once you've experimented with individual layouts, our guide to making a complete scrapbook album will help you connect those pages into a coherent story.
How to make these scrapbook layouts your own
Change the palette, not the structure
A four-photo grid can look vintage with warm brown papers, playful with pastel colors, or modern with black and cream. You don't need a new layout every time you switch themes. Keep the photo positions and change only the background, matting, or small accents.
To add a moving element to one of these layouts, try our eight interactive scrapbook techniques with pockets and flaps.
Work with your actual photo sizes
The dimensions in this guide are starting points, not downloadable full-size templates. Test each arrangement with your real photos and the page's usable area. If you need help printing decorative papers, see our digital scrapbook paper printing guide; this article stays focused on arranging the page itself.
Repeat one design for a mini series
Choose one of the twenty layouts and make three different pages from it: one for a trip, one for a family memory, and one for an ordinary afternoon. Repeating a structure makes it easier to build your own eye for spacing, color, and storytelling.
If you're drawn to a particular visual world, explore our kawaii scrapbook ideas for beginners. That guide concentrates on a specific cute, pastel aesthetic; the designs here work across many themes.
Common beginner scrapbook layout mistakes
Decorating before choosing the story
Start with the photograph and the reason it matters. Stickers and patterned paper should support that memory, not become the entire point of the page.
Gluing everything down too early
Move the photos and paper pieces around before attaching them. You can take a quick reference picture of your dry layout and then glue the background pieces first, followed by the photographs and small details.
Putting important details next to the binding
A layout can look beautiful on a flat desk but hide a face or a caption once it's inside an album. Keep crucial content away from the inner edge and any punched holes.
Using four nearly identical photos
Four-photo layouts are more interesting when the pictures contribute different information: a wide view, a portrait, a close-up, and a detail. More photographs don't automatically mean a better story.
Forgetting the words
Years later, a date, a person's name, or a short sentence may matter more than an extra embellishment. If you don't enjoy long journaling, use one small label instead.
FAQ: Easy scrapbook page ideas for beginners
Start with one photo and finish one page
You don't need to master twenty different techniques. Pick one layout, choose a photo that matters, and spend five minutes arranging everything before you glue it down. A simple finished page often feels more meaningful than a complicated project left unfinished.
When you'd like coordinated graphics to complement your own pictures, browse the Pixel Scrap printable packs. They're downloadable design files for crafting, not physical photo albums or ready-made scrapbook pages. Your memories are what turn the layout into something personal.