What Size Photos for Scrapbooking? Print Sizes, Cropping & Quality Guide
Choose the right scrapbook photo sizes, from 4×6 prints to mini photos. Learn cropping ratios, print resolution and how to prepare photos for an album.
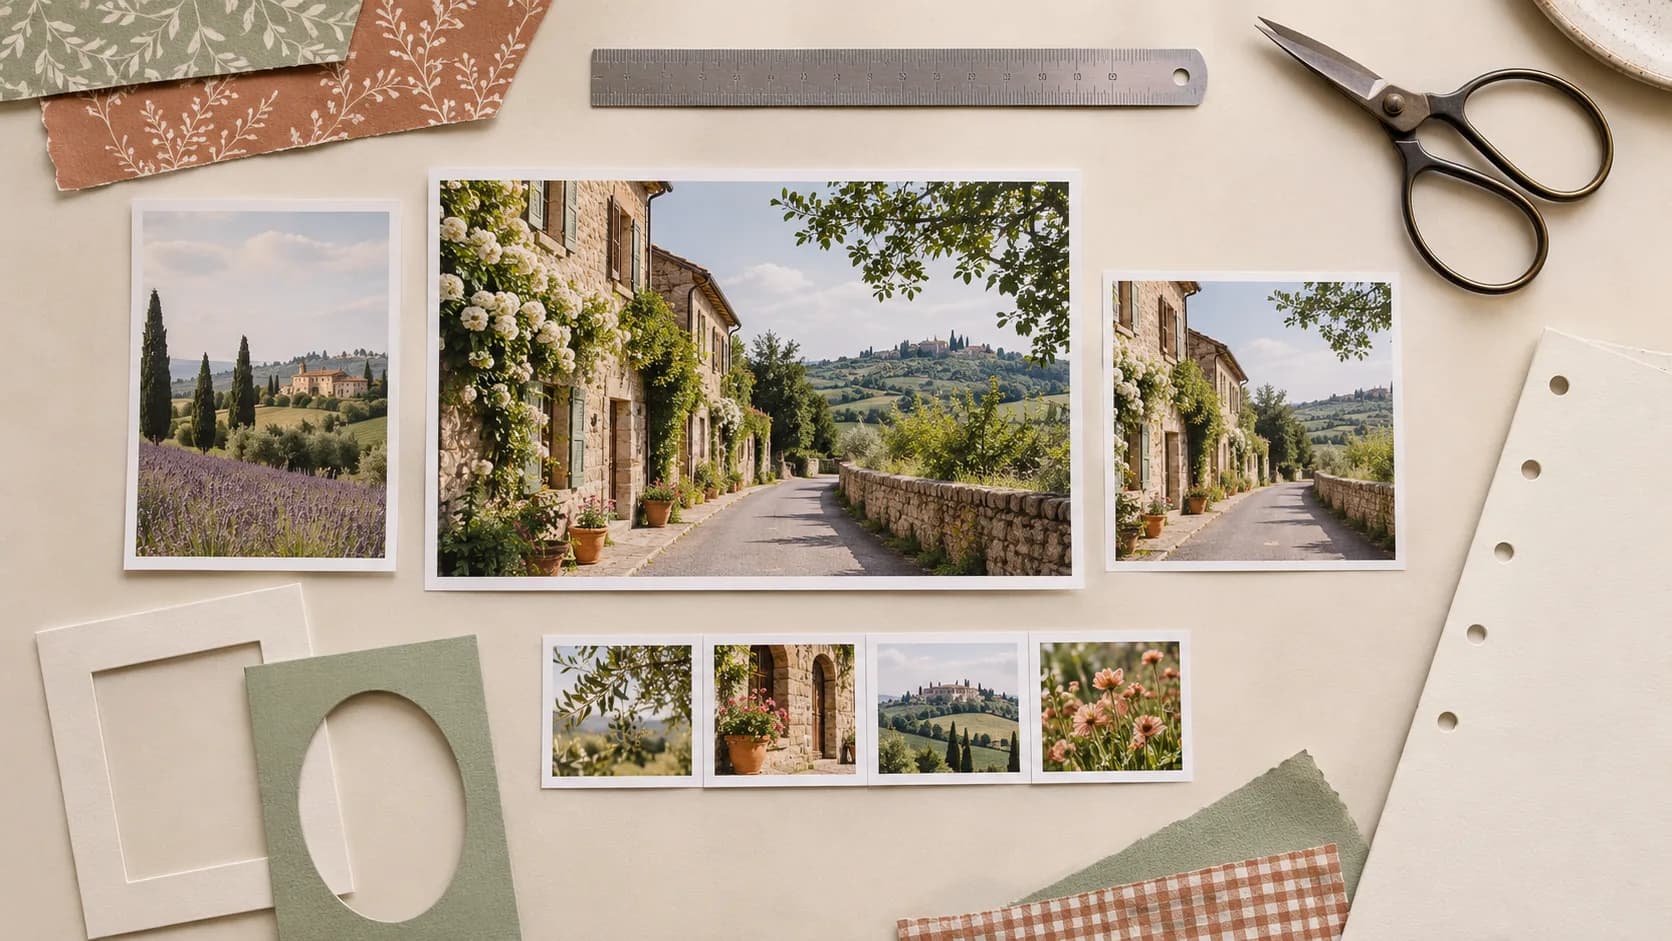
You have picked the memories for your next album, but the photographs are still on your phone. What size should you print photos for scrapbooking? A standard 4 × 6-inch print looks relatively small in your hand, yet it takes up a large portion of an 8 × 8-inch scrapbook page. Print every image that size, and your album may run out of room for dates, tickets and personal notes.
The right print size depends on your page dimensions, the role of the photo and its original aspect ratio. A little planning before ordering prints can prevent awkward crops, blurry enlargements and piles of unused pictures.
This guide covers standard and small scrapbook photo sizes, how to crop images without losing important details, and how to prepare printable photos at home or through a lab. It is deliberately different from our 20 easy scrapbook page layout ideas: those focus on where to arrange pictures. Here, we focus on getting the pictures ready first.
Scrapbook photo sizes: a practical chart
There is no universal photo size for a scrapbook. Instead, it helps to have a few repeatable print sizes that you can mix and match.
| Print size | Best use | What to consider |
|---|---|---|
| 4 × 6 in | Main photo on an 8 × 8 or 12 × 12 page | Familiar 3:2 ratio; can dominate a small page |
| 3 × 4 in | Secondary picture, portrait, everyday memory | Popular for smaller pages and pocket-style projects |
| 3 × 3 in | Square detail or centered subject | Usually requires a square crop |
| 2 × 3 in | Mini photos and short sequences | Good for a group of moments; check faces stay visible |
| 5 × 7 in | Larger feature photo | Works best on a generous page or spread |
These are suggested design sizes, not a promise that every photo lab offers them as individual products. A small or unusual size may be easiest to print as part of a larger collage sheet and cut out afterward.
Choosing photo sizes for an 8 × 8-inch scrapbook
Place a landscape 4 × 6-inch print in the center of an 8 × 8-inch page. Before allowing for the binding, that leaves 1 inch of space on the left and right, and 2 inches above and below. You have enough room for a short date or a strip of patterned paper, but not necessarily a second full-size photograph.
If you want two pictures, 3 × 4-inch prints are often more flexible. Another option is a 4 × 6 main image paired with a tiny 2 × 3 detail on the facing page. Leave extra clearance near the binding.
If you are making an album from scratch, our step-by-step scrapbook album tutorial explains how to plan a complete sequence of pages. This article sticks to sizing the photos that will go inside them.
Choosing photos for a 6 × 6-inch mini album
A 4 × 6 print reaches the full width of a 6-inch page even before you account for holes, rings, a spine or margins. For many mini albums, a 2 × 3-inch or 3 × 3-inch photo is more comfortable. A 3 × 4 portrait may also work, depending on the page design.
Measure the usable area, not just the size printed on the album package. The inside edge of a ring-bound page may lose more space than you expect.
Choosing sizes for a 12 × 12-inch page
A larger page can hold a 4 × 6 print alongside several smaller images, paper strips, tickets or journaling. You can also feature a 5 × 7 print when the photo deserves more attention. That does not mean you should always fill the space: one strong photo with breathing room can be more memorable than six images fighting for attention.
Try a paper mockup: cut scrap paper to the exact sizes you are considering. Place the rectangles on your page before ordering prints. You will immediately see whether your page has enough room for writing and decoration.
Aspect ratios: why printed photos get cropped
Print dimensions describe how big the paper is. Aspect ratio describes the shape of the image. Two photos can be the same height but have very different proportions.
A standard 4 × 6-inch print has a 2:3 ratio, or 3:2 in landscape orientation. Many phones capture standard photos in 4:3. These shapes are not identical, so filling the entire 4 × 6 print will usually require a crop.
Example: a 4:3 phone picture printed at 4 × 6
Imagine a picture of a family at a dinner table. One person is close to the top edge and a wrapped gift sits near the bottom. When the 4:3 image is cropped to 3:2, part of the image height is lost. If the lab centers the crop automatically, the top of a head or the gift could be cut off.
You have two good choices:
- Crop intentionally to 3:2, and move the crop frame to keep the important people and objects visible.
- Keep the entire original image, using borders when the printing service allows a fit-within-paper option.
Neither approach is always best. A landscape can benefit from a tighter crop. A group photograph may need more surrounding room so nobody gets cut off.
Square prints and vertical photos
A 1:1 square can work beautifully for a centered object, portrait or detail, but it removes part of a rectangular original. A 3:4 portrait preserves more vertical space and may be better for a person standing up. A 16:9 panoramic image looks wide and cinematic, but may appear very short if printed small.
Do not stretch an image to make it fit a different shape. Crop it, reduce the print size or add a border. Stretching changes the appearance of people and objects.
How to crop a photo without losing its story
Cropping should strengthen a memory, not accidentally remove the detail that makes it meaningful.
1. Identify the main subject
Is your picture about a face, a gesture, a place, an object or a relationship between people? Protect that subject first. If the story is a child opening a present, make sure the hands and the present remain visible. An unimportant section of ceiling may be easier to remove.
2. Check the edges before ordering
Some print labs enlarge or trim images slightly during production to avoid unintended white edges. That means the visible preview may not match every millimeter of the final print. Keep critical faces, dates and fine details away from the extreme edge, and check your lab's cropping instructions.
3. Keep the original photo intact
Export a separate print-ready version rather than overwriting the original. A useful filename might be weekend-03-4x6.jpg. If you later need a square print, you can crop from the full-resolution source again.
4. Edit gently and consistently
A modest brightness or contrast adjustment may be enough. Heavy filters can hide texture and change skin tones. If several pictures will sit on the same spread, aim for reasonably consistent brightness while allowing each moment to retain its natural colors.
How many pixels do scrapbook photos need?
For pictures viewed at close range, 300 pixels per inch (PPI) is a common quality target. A 1,200-pixel-wide file printed 4 inches wide gives 300 pixels per inch.
The rule is straightforward:
Image pixels = printed inches × 300.
Here are easy-to-remember targets at approximately 300 PPI:
| Final print | Approximate image dimensions |
|---|---|
| 2 × 3 in | 600 × 900 pixels |
| 3 × 3 in | 900 × 900 pixels |
| 3 × 4 in | 900 × 1,200 pixels |
| 4 × 6 in | 1,200 × 1,800 pixels |
| 5 × 7 in | 1,500 × 2,100 pixels |
These dimensions apply to the cropped photo, not just the source image before cropping. A picture may still print acceptably below this target depending on its sharpness, the material and viewing distance. Think of 300 PPI as a useful preparation benchmark rather than a magical guarantee.
Changing a DPI setting does not add detail
You may see the term DPI in photo software, but the distinction matters: PPI describes the image pixels per inch at the chosen print size; printer DPI refers to printed dots. Typing “300 DPI” into a file's metadata does not make a 600 × 400-pixel screenshot suddenly sharp at 8 × 10 inches.
Check the actual pixel dimensions. If you have a choice between a compressed image from a message thread and the original file from a phone or camera, use the original whenever possible. Avoid enlarging screenshots and tiny social-media downloads for a feature photo.
Prepare scrapbook photos for printing in six steps
You do not need expensive editing software. Any photo editor that lets you crop to a chosen ratio, check pixel dimensions and export a file will do.
Step 1 — Select the pictures that add something different
Create a folder for your project. Pick a main scene, one portrait, a close-up and a few supporting details. Five nearly identical pictures of the same moment rarely make a page more meaningful.
Step 2 — Give each photo a role
Label the files main, supporting or detail. A photo that carries the story deserves enough space to be readable. A picture showing a tiny detail may work better as a small accent instead of a full-size print.
Step 3 — Measure the album page
Check the actual page size and reserve space for the binding, a short caption or a piece of memorabilia. Choose the photo print size after measuring the space, not before.
Step 4 — Match the crop to the print shape
Set the cropping ratio to 3:2 for a 4 × 6, 1:1 for a square or the precise ratio required for your custom size. Move the frame to protect people, hands and important objects. Save a separate export.
Step 5 — Confirm the remaining pixel dimensions
Check the pixel count after cropping. If the image becomes too small for the intended print, choose a smaller physical size rather than relying on aggressive enlargement. A crisp mini photo can look much better than a soft, oversized print.
Step 6 — Make one or two test prints
Before printing a whole album, compare a sample print with your page materials. Check the physical measurements, the crop, color and sharpness. Place the real print beside your patterned paper and labels before committing to the whole batch.
Print several small scrapbook photos on one sheet
Mini albums and everyday journals often need photos smaller than a standard lab print. A contact-style print sheet allows you to arrange several images on one page and cut them apart after printing.
Example using US Letter paper
US Letter measures 8.5 × 11 inches. You can place multiple 2 × 3 or 3 × 4-inch photos on a sheet, provided you allow for printer margins, spacing and trimming. The exact number depends on the photo orientation, the printer's printable area and whether you need white borders.
A reliable process is:
- Create a US Letter document at its actual physical size.
- Add frames matching the intended photo dimensions.
- Place cropped images inside the frames without stretching them.
- Leave a little space between frames for cutting.
- Export at suitable quality and print at 100% scale, without an automatic fit-to-page adjustment.
- Measure one printed photo before trimming the full sheet.
If you are sending a collage sheet to a commercial photo lab, confirm that the service supports your chosen format and whether it applies any edge trimming or enlargement. A 4 × 6 collage layout can lose a small amount around its outside edges.
Are white borders useful?
They can be. A narrow white edge makes a picture stand out from colorful patterned paper and can add an instant-photo feel without special equipment. But remember that the border uses physical space. A 2.5 × 3.5-inch picture with a quarter-inch border on every side becomes a 3 × 4-inch piece overall.
Plan for the outside dimensions when arranging the finished scrapbook page.
Matte, glossy or lustre photo paper?
For a scrapbook that you handle, layer and decorate, matte and lustre/satin finishes are often convenient starting points. Matte reduces glare and can look natural beside printed craft papers. Lustre adds some depth to the colors while usually reflecting less light than a high-gloss finish. Glossy can be vivid, but fingerprints and reflections may be more noticeable.
Also consider thickness. A scrapbook packed with photo paper, cardstock, pockets and stickers can grow bulky quickly. For keepsakes you want to preserve, use photo-safe materials and avoid gluing irreplaceable original prints directly to your pages.
Printing decorative scrapbook paper and stickers is a separate technical workflow. Our guide to printing digital scrapbook paper at home covers printer settings, scaling and craft-paper choices in detail. Photo paper may need different settings and media profiles.
Three examples: which photo sizes should you choose?
A travel weekend scrapbook
You have a photograph of a street, a portrait outside a museum and two small details from the trip. On a pair of 8 × 8-inch pages, a 4 × 6 main print, 3 × 4 portrait and two 2 × 3 details offer a flexible mix. A printed ticket or postcard copy can add context without competing with the photographs.
A coordinated travel-inspired printable pack such as Vintage Travel can provide decorative accents around the photos. The downloads are creative elements; they are not physical photo prints or photo-printing services.
A family celebration
The group photograph matters because of everyone who was there. If a 3:2 crop removes someone on the edge, keep the original ratio and add a border. Print one or two smaller supporting pictures of the cake, a gesture or an important detail. The main image tells you who; the supporting images help tell you what happened.
An everyday memory journal
A pocket journal might need only two 2 × 3-inch photos: morning coffee and a walk outside. Smaller formats leave room for a date and a short handwritten note. If the people or details are too tiny at that size, choose one larger photo instead of squeezing in several.
Once your photos are printed, the next step is composition. Explore our 20 beginner-friendly scrapbook page layouts to choose a design that suits the number and orientation of your pictures.
Seven photo-printing mistakes to avoid
1. Ordering every picture at 4 × 6
It is a convenient default, but a 4 × 6 can overpower a mini album. Mix one main size with smaller supporting prints.
2. Confusing the paper dimensions with the image dimensions
A printed picture with a white border has two sizes: the image itself and the finished piece. Measure both when the layout must fit a precise space.
3. Leaving cropping to an automated preview
Check each important image. A centered crop may remove a face, a hand or a detail close to the edge.
4. Enlarging a compressed file
A file copied from a chat can look fine on a phone screen but print badly. Use the original image when possible, or choose a smaller physical print.
5. Using “fit to page” for a measured collage sheet
This can change the photo sizes. When exact dimensions matter, set up the document at the final paper size and print at 100% if your printer allows it.
6. Forgetting the binding area
Your photos may fit on a loose square of cardstock and still end up too close to the rings or spine once inserted into the album.
7. Gluing before comparing the real prints
Printed colors and sizes can differ from the screen preview. Lay out the photos on the page first, then decide which papers and embellishments belong beside them.
FAQ — Scrapbook photo sizes and printing
Print for the memory, not just for the page
Most beginners do not need dozens of print sizes. One main photo size, one supporting size and a few mini prints can cover a wide range of scrapbooking projects. What matters most is checking the crop, keeping meaningful details visible and choosing a size that works with your page.
Once the photos are ready, you can focus on the personal elements that make a scrapbook special: written memories, tickets, layered papers and little details that connect the pictures. Browse the Pixel Scrap printable packs when you want coordinated decorations, and choose only the pieces that help your photographs tell their story.